The Plow Point Tarp Configuration for High Wind Stealth Camping
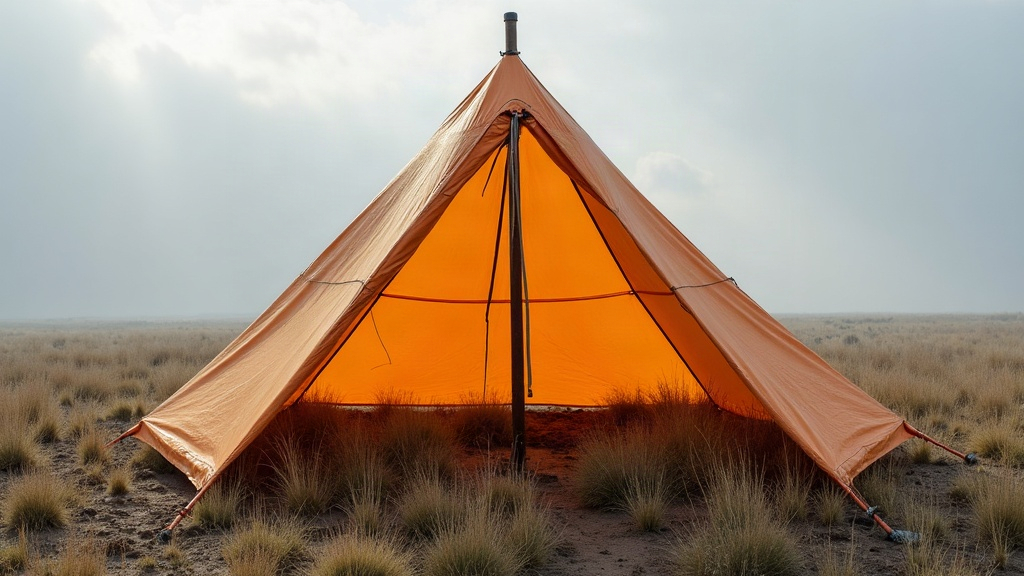
When you’re deep in the woods trying to stay hidden while a gale is doing its best to rip your shelter apart, your setup choice stops being a preference and becomes the thing standing between you and a miserable night. The plow point tarp configuration for high wind stealth camping is, hands down, one of the most reliable, efficient, low-profile shelters you can throw up in a hurry. One high anchor point, three corners staked to the ground, and you get an aerodynamic pitch that sheds wind, hides your footprint, and goes up in under two minutes. If you’re a minimalist backpacker, a survivalist, or someone who genuinely needs to vanish from sight for the night—whether you’re building a Dakota fire hole in clay or pitching a tarp—this is a skill worth drilling until it’s second nature.
What is the Plow Point Pitch?
Think of the plow point as a bit of minimalist geometry that just works. You take a standard square tarp (a 10x10 foot or 3x3 meter piece is the usual choice) and pitch it on the diagonal instead of straight. One corner gets hoisted up, either to a tree branch or propped on a sturdy trekking pole, while the other three go straight into the dirt.
What you end up with is a sloped, pyramid-ish structure, kind of like the blade of a plow (hence the name). It looks small from the outside, but the interior is surprisingly roomy, and that steep roofline does a great job of throwing off rain, snow, and wind alike.
Dominating High Winds
Traditional A-frame setups have a bad habit of turning into sails the moment a gust hits them. The plow point sidesteps that problem, and here’s why it holds up so much better:
- Aerodynamic Deflection: Point the rear corner straight into the prevailing wind and the steeply angled walls force gusts up and over the top instead of catching them. Rather than lifting the tarp off the ground, the wind actually presses it down, which only tightens your stakes further.
- Minimal Failure Points: Three corners pinned to the earth, one line under tension. That’s it. Fewer connections means fewer things that can snap, slip, or tear loose when a storm starts throwing its weight around at 2am.
- Elimination of Wind Tunnels: An open A-frame or a tube tent lets wind funnel straight through, and that draft will steal your body heat fast. Because the plow point closes off the rear and sides, there’s no tunnel effect to fight, and the cold convective currents that usually creep in just aren’t there.
The Ultimate Stealth Camping Shelter
Stealth camping comes down to three things: staying unseen, leaving no trace, and moving fast. The plow point handles all three without much effort.
- Low Visual Signature: This pitch sits low, really low. Pair it with an olive drab, coyote brown, or camo tarp and it practically melts into the underbrush. Walk thirty yards away and turn around, and there’s a decent chance you won’t spot it yourself.
- Lightning-Fast Deployment: In stealth camping, every extra minute spent exposed is a minute too many. Since you only need one anchor point and three stakes, you can go from hiking boots to lying inside a dry shelter in well under 90 seconds. That matters more than people think when it starts raining sideways.
- Tiny Footprint: No need to hunt down two perfectly spaced trees for a long ridgeline. This pitch tucks into dense thickets, rocky nooks, and narrow gaps in the brush, places where a freestanding tent simply wouldn’t fit.
Step-by-Step Setup Guide
The build itself is dead simple. The real skill is in the tension, and that’s what separates a shelter that survives the night from one that doesn’t.
- Assess the Wind: Figure out which way the wind is blowing before you do anything else. The back corner, the one opposite your entrance, needs to face directly into it.
- Anchor the Rear: Spread the tarp flat on the ground. Grab that back corner and stake it firmly into the dirt.
- Stake the Sides: Pull the two side corners outward to form a triangle shape on the ground, then stake them down tight. The bottom edge should have no slack in it.
- Hoist the Peak: Clip a length of paracord or a dedicated guyline to the remaining front corner. Tie it off to a tree trunk, a sturdy limb, or the top of a trekking pole. A trucker’s hitch or taut-line hitch will let you crank the tension exactly where you want it.
Pro Tips for Extreme Conditions
When the forecast looks genuinely ugly, a few extra tweaks can make the difference between a shelter that holds and one that doesn’t.
- Implement Shock Cord Loops: Tie short, roughly 6-inch loops of heavy shock cord (bungee) into your ground tie-outs. This gives the tarp a little give during heavy gusts, so it flexes instead of tearing or yanking the stakes straight out of soft, wet soil.
- Use Deadman Anchors: Standard aluminum stakes are basically useless in loose sand, mud, or gravelly soil. Skip them and try a deadman anchor instead: tie your guyline around a thick stick or rock and bury it horizontally a foot or so down. It holds far better than any stake in that kind of ground.
- Deep Interior Positioning: The plow point’s open front is its one weak spot, since driving rain can sneak in at an angle. Push your sleeping pad and bivy as far back into the rear apex as you can. Even a foot or two of extra depth keeps you noticeably drier.
Conclusion
The plow point tarp configuration for high wind stealth camping hits a rare balance: fast to set up, tough against rough weather, and nearly invisible once it’s pitched. It strips shelter-building down to the essentials without asking you to sacrifice safety or comfort for it. Run through this pitch a few times in your backyard or a local park until the knots and tensioning feel automatic, not something you have to think through step by step. Because when a storm rolls in unannounced and you need to disappear into the landscape fast, muscle memory is what saves you, not a manual in your pocket.