How to Build a Dakota Fire Hole in Waterlogged Clay Soil
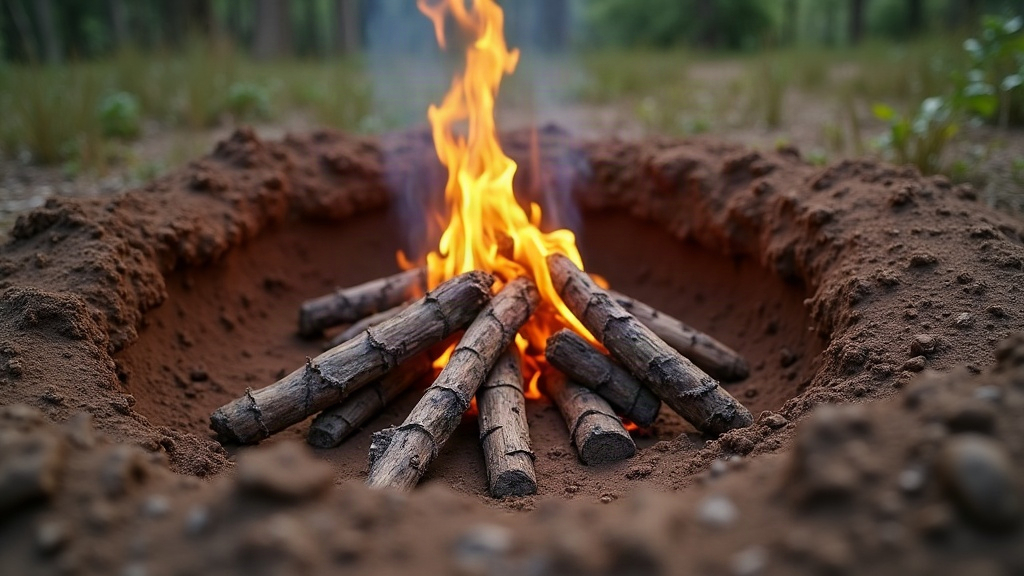
Building a Dakota Fire Hole in Waterlogged Clay Soil
Most bushcrafters think of a Dakota fire hole as a five-minute job: dig two holes, connect them, light your tinder, done. But try that in soggy clay after a week of rain and you’ll learn fast why it’s not that simple. Saturated clay doesn’t drain, it just sits there and holds water like a bathtub, and your carefully dug fire pit turns into a small pond before you’ve even struck a spark. The fix isn’t complicated, though. Pick your spot carefully, dig a small drainage sump, and raise your fire off the ground using fatwood from wet woodlands, and you can still get a hot, smokeless, well-hidden fire going even in genuinely miserable conditions.
The Challenge of Saturated Clay
Clay is made of tiny, tightly packed particles that lock together almost like cement once compressed. That’s actually great news for your walls and tunnel; they’ll hold their shape without collapsing. The bad news is what happens when that same clay gets wet. It stops absorbing water almost entirely and instead behaves like a ceramic bowl, sealed at the bottom, with nowhere for moisture to go. Rain, groundwater, even dew seeping through the walls, all of it collects right where you need dry ground. You can’t wait this out. You have to manage the water on purpose, from the first shovelful.
Essential Tools and Materials
Get everything together before you start digging. The last thing you want is to be scrambling for dry fuel with wet clay already caked on your hands.
- Entrenching Tool (E-tool) or Sturdy Digging Stick: Wet clay is heavy, sticky, and stubborn. A cheap folding shovel will save your back and your patience over a whittled stick.
- Flat Stones or Thick Green Branches: These become your false floor, so grab more than you think you’ll need.
- Dry Tinder and Fatwood: Standing deadwood (the stuff that never touched the ground) or a chunk of resinous pine is worth hunting for. It’s often the difference between a fire and a pile of smoking mush.
- Bark: Birch or cedar bark works as a barrier layer, keeping your tinder off anything damp.
Step-by-Step Construction Guide
Step 1: Strategic Site Selection
Skip any low spot, hollow, or the base of a slope, water heads downhill and pools exactly there. Instead, hunt for a bit of high ground: a low mound, a small ridge, even just the upper edge of a gentle grade. Even three or four inches of elevation over the surrounding ground makes a real difference in how much water seeps into your pit while you’re digging.
Step 2: Digging the Main Chamber and Sump
Dig the main fire chamber roughly 12 to 14 inches deep and 10 to 12 inches across, tapering the bottom so it flares slightly like a jug rather than a straight-sided cylinder.
Here’s the part standard instructions skip: in wet clay, you need a sump. At the very bottom center of the chamber, dig a second, smaller hole another 4 to 6 inches deeper. Think of it as a catch basin. Water bleeding out of the surrounding clay walls will run into this low point instead of spreading across your fire floor, which is exactly what you want.
Step 3: Crafting the Airway Tunnel
Check which way the wind’s blowing before you dig anything else. About a foot upwind of the main chamber, start your ventilation tunnel and angle it down at roughly 45 degrees until it meets the base of the fire chamber, just above the sump, not into it. Clay actually works in your favor here: it’s dense enough that you can dig a narrow, smooth-walled tunnel without worrying about it caving in on you, which is more than you can say for sandy soil.
Step 4: Building the False Floor
This step matters more than any other when the ground is soaked. Tinder sitting directly on wet clay is basically dead on arrival.
- Collect flat, dry stones (skip river rocks, trapped moisture inside them can make them crack or even pop when heated) or thick, wrist-diameter green branches.
- Lay them across the bottom of the chamber so they bridge the sump hole underneath.
- What you end up with is a raised, dry platform. Water drips down through the gaps into the sump below, while your fire sits up top, untouched and safe.
Fire Lay and Ignition in Wet Conditions
A false floor solves the drainage problem, but the air inside a wet clay hole is still going to be humid, sometimes noticeably so. Your fire lay needs to fight that with airflow and a well-shielded ember.
- The Platform Lay: Spread a layer of dry bark over the false floor first. It acts as an extra moisture shield before anything else goes on top.
- Generous Tinder: Use about three times your usual amount of dry tinder, fatwood shavings, scraped birch bark, whatever’s driest and most resinous you’ve got. In damp conditions, a normal-sized tinder bundle just won’t cut it.
- Log Cabin Structure: Stack pencil-thin dry twigs in a small log cabin shape around the tinder. This keeps the damp, heavy clay walls from smothering your first flames and creates a chimney effect that pulls air hard through the ventilation tunnel, exactly what a struggling fire needs.
Troubleshooting Common Issues
- The Sump Overflows: If the ground is so wet that the sump fills up fast, bail it out with moss (it works surprisingly well as a sponge) or a cup before you light anything. Once the fire’s burning hot, the heat itself will bake the surrounding clay and dry out the seep, so this problem tends to fix itself after the first 20 minutes or so.
- Poor Draft: Smoke pouring out of the main hole instead of drawing through cleanly usually means your airway’s blocked. Wet clay likes to slump and cave into the tunnel. Keep a long straight stick nearby and ream it out whenever the draft weakens.
Conclusion
Getting a Dakota fire hole going in waterlogged clay takes more sweat and more patience than the dry-ground version, no way around that. But the fundamentals hold up: find high ground, dig a proper sump, and build a false floor to keep your coals up out of the mud. Do those three things right and you can turn what looks like a hopeless, sopping mess of a campsite into a spot for a hot, efficient fire that barely smokes at all.