Hand-Stitching Torn Canvas Rucksacks with a Speedy Stitcher Awl
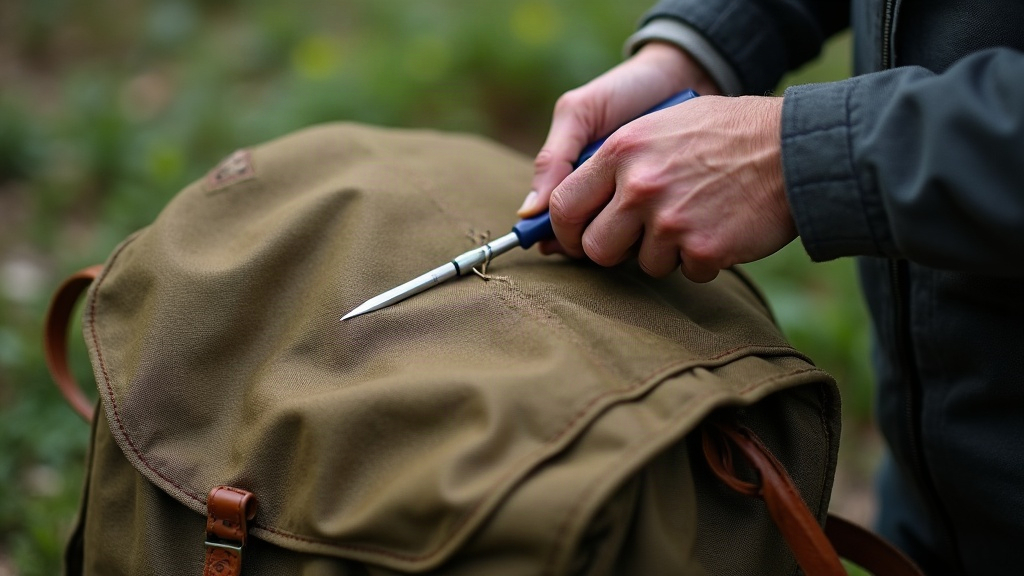
A torn canvas rucksack miles from the trailhead doesn’t have to end your trip. With a Speedy Stitcher awl, some waxed thread, and a little practice beforehand, you can sew a lockstitch repair tough enough to carry you through the rest of the journey, and well past it. Here’s how to actually do it, from sizing up the damage to tying off a seam that holds.
Why the Speedy Stitcher Is the Right Tool
The Speedy Stitcher is a small, spring-loaded hand awl built to push heavy-duty thread through thick stuff: canvas, leather, webbing, the reinforced base of a pack. Unlike a basic needle-and-thread patch job, or a sewing machine you obviously don’t have on a mountainside, it produces a true lockstitch. Each stitch locks itself independently, so if one gives out, the whole seam doesn’t unravel behind it. That difference matters a lot when the nearest gear shop is three days away.
A few reasons it earns a spot in a repair kit:
- It handles multiple layers of heavy canvas without complaint, including reinforced bottom panels and strap bases
- It weighs under 2 oz, so there’s no excuse not to carry it
- No power, no flat table, nothing. You can stitch standing up, leaning on a tree trunk
- Spare needles and thread cost almost nothing and take up no room
What to Pack Before You Go
A proper repair kit should have:
- A Speedy Stitcher awl, plus at least one spare needle (they’re the part that snaps first, almost always)
- Waxed polyester or nylon thread, bonded, 20-30 feet minimum, wound on a bobbin
- Small sharp scissors or a pocketknife for trimming
- A scrap of ripstop canvas or Tenacious Tape for backing larger tears
- Beeswax, just in case your thread arrives unwaxed
- Pliers, even the tiny ones on a multitool, for yanking the needle through stiff or doubled-up fabric
Step-by-Step: Repairing the Tear
1. Clean and Assess the Damage
Knock off the dirt and grit, then lay the tear out as flat as you can get it. Is it a clean rip, or frayed and jagged at the edges? Clean rips are simple. Frayed ones need a backing patch, no way around it.
2. Thread the Awl
Drop the bobbin into the handle, run the thread through the hollow needle along the awl’s built-in groove, and pull a few inches of tail through the eye. Leave that tail hanging loose; you’ll need it in a moment to lock your very first stitch.
3. Add a Backing Patch for Larger Tears
Anything longer than 2 inches, or frayed at the edges, gets a patch of spare canvas or heavy ripstop behind it before you stitch a single thing. The patch spreads the load across more fabric so the tear doesn’t just reopen the second you load the pack up again.
4. Push the Awl Through
Pinch the fabric between your fingers, or brace it on your knee, whatever keeps it still. Push the needle straight through the fabric and the patch underneath. Pull the handle back roughly halfway: this leaves a loop of thread hanging on the underside. Pass the tail through that loop. That’s the whole trick behind the lockstitch.
5. Work in a Straight or Zigzag Line
Keep stitches about 1/4 inch from the torn edge, spaced 1/8 to 3/16 inch apart. On high-stress spots, strap attachment points, the pack’s base, run a second row offset from the first. Takes an extra minute, saves you a second repair.
6. Finish and Lock Off
Finish with two or three stitches through the same hole to lock everything down, then trim the thread close. If it’s synthetic, a quick touch with a lighter melts the end just enough to stop it working loose (go easy, a split second is plenty).
Common Mistakes to Avoid
- Stitching right at the torn edge. Give yourself at least 1/4 inch of margin, or the fabric just tears again along your new stitch line
- Skipping the backing patch on anything sizeable. A lockstitch by itself won’t stop a big tear from spreading further
- Pulling the thread too tight. Stiff canvas puckers and actually weakens under too much tension
- Leaving the spare needle at home. They’re thinner than you’d think and snap on thick webbing more often than seems fair
When to Patch vs. When to Just Get Home
A small, non-structural tear, a scuff on a side pocket, say, barely needs more than a quick stitch and you’re moving again. But if the damage sits on a load-bearing seam (shoulder strap bar tacks, hip belt attachment, the main body seam), treat your field repair as temporary. Get it properly re-sewn or reinforced once you’re back somewhere with a sewing machine and decent light.
Final Thoughts
A Speedy Stitcher turns a ripped pack from a trip-ending disaster into a five-minute detour. The lockstitch itself isn’t hard to learn, the tool fits in a pocket, and if you run through it once on an old backpack or scrap of canvas before you leave, you’ll have the muscle memory to fix whatever the trail throws at your gear.